Feeds:
Posts
Comments

Archive for the ‘Sweet Recipes’ Category

Back to My Sweet Self

Kevin discovered a wholesale restaurant supply store around the corner from our house awhile back and told me to check it out when I was preparing to bake a cake this Christmas. For someone with a new found passion for baking, I had a pathetic entourage of bakeware and jumped at the chance to expand my collection (for a fraction of retail cost, at that)!

I found some mini 3″ tart molds with removable bottoms for $1.60 each!!! I bought half a dozen. And yes, after making my first batch of tarts, plan to go back next week and buy the other half dozen plus a large tart mold 😀 I’m obsessive like that. Thanks to my wonderful hubby, who had Christmas Eve off and watched Brady all day, I got to baking again.

After browsing quite a few tart recipes, I decided to go with a non-roll-out-dough shell. I hate making dough… perhaps because it usually requires getting my hands dirty (and I hate getting my hands dirty) and cleaning the mixing bowl afterwards is a pain. Bah!

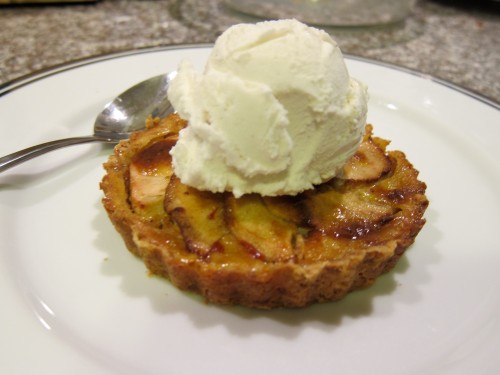
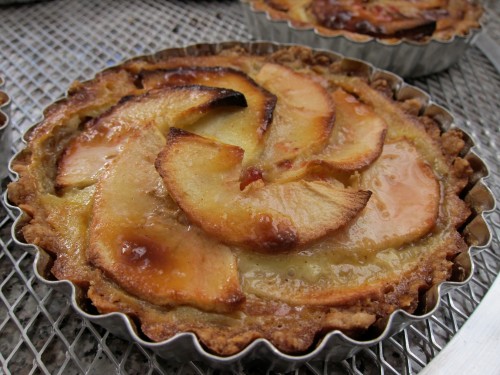
So here’s my yummy rendition of an apple cinnamon tart. It turned out so well that I was even impressed with myself! 🙂 Next up… Lychee tarts in coconut shells.

Oh my, all that yumminess!

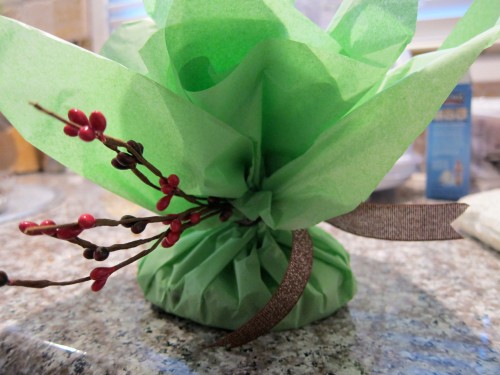
Nicely wrapped for our neighbors. It’s all about the presentation!
A la mode. O.M.G.
Makes 6 3″ tarts 

The No-Roll (!) Dough:

2 egg yolk
1 tablespoon cold water
1 cup unbleached all-purpose flour
2/3 cup crushed graham crackers
2 tablespoons granulated sugar
1/4 teaspoon fine salt
1 teaspoon finely grated lemon zest
4 ounces (1 stick) cold, unsalted butter, cut in 1/2-inch slices
1. Beat the egg yolks with the water in a small bowl.
2. Combine the flour, graham crackers, sugar, salt and lemon zest in the bowl of a food processor fitted with the metal blade and pulse briefly to mix the ingredients. Add the cold butter pieces and pulse several times until the mixture looks evenly crumbly. Open the lid and dribble the egg yolks and water over the dry ingredients. Pulse the machine several times until the dough looks like wet crumbs, but does not yet clump together.
3. Scoop the dough into 6 fluted tart pans with a removable rim and spread the crumbs evenly over the bottom of the pans. Cover the tart with a piece of plastic wrap and use your fingers to press it evenly into the sides of the pan first, and then the bottom. Bake at 375°F for about 8 minutes. Take out of the oven and begin to place the filling (but leave the oven at 375°F).
The Filling:
4-5 large apples (I like granny smiths), about 1 3/4 pounds
1/3 cup plus 3-6 tablespoon sugar
2 tablespoons cinnamon
1 teaspoon vanilla extract
1 egg yolk
1/2 cup milk or cream
3 tablespoons apricot jam
1 tablespoon water
1.Peel and halve the apples and core them. Set 2-3 apples aside for the top of the tart and cut the remaining 2 apples in small (1/4-inch) cubes. Mix the chopped apples with 1/3 cup sugar, cinnamon and the vanilla and spread them evenly over the bottom of the tart pan.
2.With the flat side down, cut the remaining apples in thin, half-moon slices. Lay the slices over the top of the tarts in a circular pattern, overlapping them as you place them on the tart.
3.Bake the tarts for 25 minutes. Remove it from the oven. Whisk the egg yolk, milk and remaining 3-6 tablespoons sugar (6 if you’re using granny smiths, 3 if you’re using a sweeter type of apple) together until thoroughly combined. Pour it over the apples and return the tarts to the oven to bake for 20 to 25 minutes, until the custard is set and the apples are golden brown. Let the tarts cool for 20 minutes.

4.Mix the apricot jam and water in a microwave safe bowl and heat on full power for 1 minute in the microwave. Strain if necessary and brush the glaze over the cooled tart with a pastry brush.

Read Full Post »

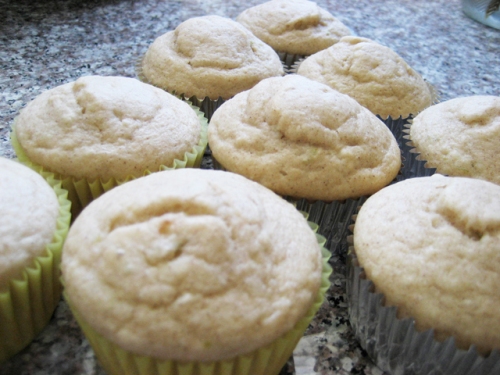
I had two over-ripen pears sitting on the kitchen counter, facing a destiny of being trashed. Before tossing them out, I decided to peruse Tastespotting to see if there were any simple recipes to turn expired fruit into something fabulous. The only criteria was I had to have every ingredient at home already. Baking can get expensive and shopping for a slew of ingredients can get very tedious (especially for someone who can’t even walk around Target for more than 15 minutes before pooping out these days). And then there was cinnamon pear muffins. It was pretty simple and turned out to be super delish! Great for breakfast or a snack.

Ingredients

2 cups all purpose flour
1/2 cup granulated sugar
3 teaspoons baking powder
1/2 teaspoon cinnamon
1/2 teaspoon salt
1 cup milk
1 egg — beaten
zest of 1 lemon or lime
1/4 cup melted butter — cooled
1 cup mashed pear pulp — (2 or 3 soft regular sized pears)
Optional: 1/2 cup chopped walnuts or pecans and/or 1 teaspoon finely minced crystallized ginger

Preheat oven to 350 degrees, F. Sift together flour, sugar, baking powder, cinnamon and salt. Mash the pears. Beat together milk, beaten egg, butter and lemon zest. Mix pears into flour mixture. Gently stir milk mixture into dry ingredients. Batter should be lumpy, not smooth. Do not over mix. Spray muffin pans with nonstick spray (or take the easy way out and use cupcake liners, to avoid too much scrubbing). Fill muffin cups 2/3 full. Bake at 350 degrees F for 20 to 25 minutes, until tops are browned.

Read Full Post »

Chocolate Banana Bread

Great as a dessert or breakfast. The only thing that could make this easy dish better would be a dash of rum and/or scoop of vanilla ice cream 😉

INGREDIENTS
4 eggs
1  2/3 cups milk (skim or plain soy)
1/2 cup sugar
1/4 cup unsweetened cocoa powder
1 tsp vanilla
1  1/2 to 2 bananas
7 to 8 slices of whole wheat bread
1/4 cup chocolate chips

DIRECTIONS
Cut the slices of bread into bite sized cubes. Cut the two bananas into similar sized pieces.

Put the bread and bananas into a 8×8 baking pan making sure the bananas are spread throughout the pan. In a large bowl combine the eggs, milk, sugar, cocoa powder, and vanilla. Pour the liquid mixture over the bread and push the bread down so that everything goes down into the liquid mixture. Let this soak together for at 15 to 20 minutes.

Bake at 350 degrees F for 25 minutes covered and 15 minutes uncovered.

Read Full Post »

Cream Puff Power!

I had my first cream puff at age 25 in Boston, courtesy of Beard Papa’s and Kevin. Amazing, what a sheltered life I lived prior to getting together with him… Kevin that is, not Papa.

With a borrowed professional mixer (courtesy of Dave), I recently picked up the hobby of baking. Great for the taste buds, hazardous for the love handles haha.

I looked up how to make cream puffs (choux à la crème, if you wanna be fancy) this week, out of curiosity, and was surprised at how SIMPLE it was! And yet, my first go at it wasn’t a success… the inside was still dense and my personal food critic demanded “MORE SUGAR!” in the cream, which is ironic because he normally avoids icings and creams for the exact reason.

When making cream puffs, it’s important to time the baking carefully. An undercooked puff results in a dense puff (damn my impatience!), which makes it hard to fill with cream. And it’s definitely not something you can pop back into the oven and fix. My second go at mastering the cream puff was successful, so here I am, sharing it with you 🙂 It’s so easy that I have to hold back from making batches after batches!
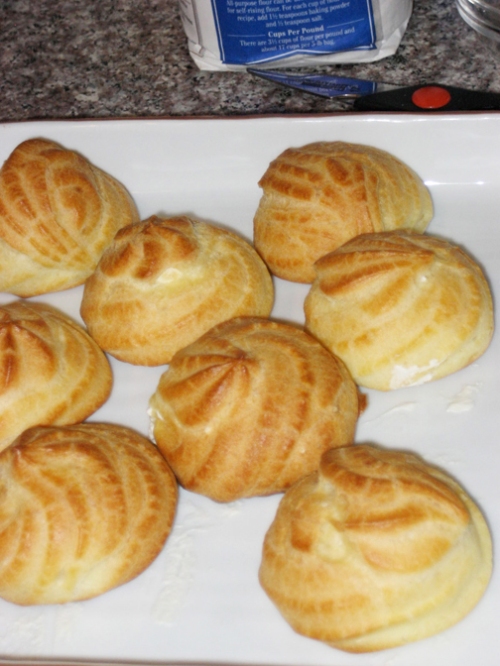
“THE PUFF”

1 cup water
1/2 cup butter (4 ounces)
1 cup all-purpose flour
1/4 teaspoon salt
4 large eggs

1. Preheat the oven to 400 degrees Fahrenheit.

2. In a small bowl, whisk together the flour and salt.

3. Bring the water to a boil in a medium-size saucepan over medium-high heat.  Add the butter.  When the butter has melted, add the flour mixture all at once and stir vigorously.  Cook and stir until the mixture forms a ball that doesn’t separate.

4. Remove from the heat and cool slightly (about 1 minute).  Add the eggs, one at a time, beating after each one until the dough is smooth.

5. Drop heaping tablespoons of dough about 1-inch apart onto a greased baking sheet.  Or transfer the batter to a pastry bag with a round tip and pipe circles about 2-inches in diameter and about 1-inch apart onto greased baking sheets.  If the puffs are medium-size (makes about 16), bake for about 30-35 minutes, and if the puffs are mini-size (makes about 4 dozen), bake for about 20-25 minutes.

To test, just take one out of the oven and open. It should feel really light, which indicates the center is fully cooked and “empty”. Remove the cream puffs from the oven and cool on a cooling rack.

CREAM FILLING

I chose to make my own cream filling (adapted from the Coconut Lychee Chinese Cake), but you can also use whipped cream or custard, ready-made, from the grocery store.

2 cups heavy whipping cream (must be cold)
1/2 tsp vanilla extract
10 tablespoons confection powder sugar

Using the electric mixer, beat cold whipping cream. Just when it gets soft and billowy, slowly and very gently add sugar and extract then beat to stiff peaks.

If you want to spice things up by adding flavor to your cream, try fusing a few tablespoons of pureed strawberry or even matcha powder, for a green tea taste. Or go wild with another flavor! I actually used a pack of powdered “green tea milk tea” mix first time around because it was handy, and it tasted great 🙂

I placed the cream in an icing bag and filled each puff from the bottom, although I recommend filling it from the side or even top, so it doesn’t squeeze out onto your lap when it’s bitten into. You can also fancy up the puff by dipping it in chocolate or topping with powdered sugar. Mine were simple (this time around) because Kevin wanted his dessert ASAP haha.

Here he is, tearing that cream puff up like it committed a crime 🙂 Look at all that cream!

Read Full Post »
I’m exhausted after a day of baking. From scratch. For the first time. All that’s left to say is, “YUMMM!!!” Lychee coconut Chinese sponge cake anyone?

CHINESE CAKE INGREDIENTS

8 jumbo eggs
1 cup sugar
1 cup cake flour
1/3 cup oil
1/2 water
1 tsp baking powder
1/2 tsp cream of tartar

1. Separate the egg yolks from the whites. Put the yolk in a mixing bowl and the whites into another mixing bowl. Make sure not to break the yolk. If there is any yolk in the egg whites it will not work. Put the cream of tartar into the egg whites and beat them with a hand mixture. This will fluff the egg whites. To test when the egg whites are ready, stick the mixer paddles into the fluff and if the fluff doesn’t run off the paddles then it is ready.

2. Preheat the oven to 350F and put the bunt pan in the oven.

3. Set the fluffed egg whites aside. In the mixing bowl with the egg yolks combine the other ingredients in the following order: sugar, cake flour, baking flour, water, oil.

4. Take a large dollop of egg white and FOLD the egg white into the mixture. Fold the rest of the egg white into the mixture accordingly.

5. Remove hot bunt pan from the oven and fill. Bake for 40 minutes to 1 hour. Check to see if the cake is done by inserting a kebab stick. If batter pulls out sticky, it’s not ready.

6. Remove cake from the oven and turn it upside down and let cool.

LYCHEE CREAM FROSTING INGREDIENTS

2 ½ cups heavy whipping cream (must be cold)
1/3 cup lychee puree
1/2 tsp vanilla extract
5 tablespoons confection powder sugar

Using the electric mixer (whisk attachment), beat cold whipping cream. Just when it gets soft and billowy, slowly and very gently add lychee puree in 3 to 4 additions, sugar and extracts then beat to stiff peaks.

ASSEMBLY
1 cup fresh shredded coconut
1 cup of fresh lychees, pitted, drained and patted dry. (Reserve juices)
¼ cup of lychee syrup or if unavailable, simmer lychee juices with sugar to make a light syrup. Lychee liquer if available is also a good substitute.

Brush each angel cake layer lightly with lychee syrup, being careful not to brush on too much as it would make the cake soggy.

Fill the layers with whipped lychee cream and fresh lychees, and then frost the entire cake. with the whipped cream. Sprinkle dessicated coconut liberally over the top and sides of the cake.

Read Full Post »

O-M-G… Plan B never tasted so good!

This easy little “dessert” was a result of my recent obsession with Chinese pineapple buns. Unfortunately, my personality is the type to always look for short cuts (which may or may not be a good thing), so recipes with even the slightest complications will always get rejected at the door. My logic is that most moms don’t always have time to bake from scratch, so quicker alternatives are necessary. Like how I justify laziness? 😀

Looks like I’ll have to continue buying Chinese pineapple buns from the Chinese grocery store. Luckily, we live down the street from one so deprivation isn’t necessary.

On to Plan B. Another obsession of mine lately has been curd (not bean curd haha). Specifically, pineapple curd. Is there a trend here? Anyhoo, craving pregnant women are a force to be reckoned with. Determined to have my pineapple-something without putting in the hours of labor, I created this sweet little thing:

Pineapple curd puff pastries! It’s perfect for parties, brunches and after-dinner treats. Or in my case, any time of day 🙂 The recipe is soooooo easy that I almost feel criminal. Kevin had one bite and confirmed its goodness with a simple “mmmmmm!” This simple sound doesn’t come out very often from my foodie husband. It’s an unconscious noise triggered when something is utterly delicious. Anything less will trigger… silence. I strive for this “mmmmm!” with each meal I cook, yet sadly, hear silence more often haha.

So here’s the rundown of how to make this tasty treat:

• 1 package of puff pastry (found in frozen food aisle, makes about 16)
• 1 – 20oz. can of either pineapple juice or crushed pineapples
• 5 egg yolks
• 3/4 cup granulated sugar
• 5 tablespoons of corn starch

Defrost the puff pastry at room temperature for about 45 minutes. In a sauce pan, mix together the pineapple juice, egg yolks, sugar and corn starch. I used crushed pineapples and pureed it with my handy new hand mixer, to make sure it was real pineapples and not “from concentrate”. Whisk continuously for about 10 minutes and the mixture will slowly thicken. Then just let it cool down.

Unroll the puff pastry sheet on a board, lightly dusted with flour. Cut the puff pastry sheet into smaller triangles, just like you would when making croissants. Put a dollop of pineapple curd at the base of the triangle and start rollin’! You can opt to put another dollop of curd on top of the pastry for that extra pineapple punch 😉

Preheat the oven (I use a toaster oven to conserve energy) at 400 degrees and bake until the pastries turn golden on top and the pastry layers “puff”; usually about 15-18 minutes. Voila!

I was able to make 16 pastries with one package. There’s plenty of pineapple curd left over, so you can opt to make more (trust me, these will disappear within minutes), use it as spread for toast, or use it in some other baking recipe. Enjoy!

Read Full Post »

…so I will make it a goal to learn how to!

Tonight was our usual “triple date night” with friends and I wanted a cute way to tell them that we are expecting a baby girl. Having never truly baked before, I thought it’d be a nice challenge that would also allow my feet to get wet in the delicious hobby. Besides, every good mom should know how to bake 🙂 Kevin and I also decided this week to have a “budget” baby shower, so the shower cake might be homemade. This was my test run at the task.

One site I absolutely LOVE to frequent is tastespotting.com. It’s a foodie website that allow bloggers to post photos and recipes of their yummy creations. I can browse this site for hours and not get bored! After filtering through 80+ cupcake recipes, I decided to make a fusion of my favorite ideas… The original plan was to make angel food cupcakes with whipped orange icing.

My protruding belly accidentally turned the oven temperature knob up and Batch #1 ended up burnt. Ooops! Can you tell between Batch #1 and Batch #2?

Although a great theory and kudos to me for the attempt to be healthy, it felt like I was eating air, not cake. Slight recipe adjustment… chocolate orange cupcakes with orange whipped cream cheese topping.

Third batch was a charm and oh so beautiful. I had to give myself a pat on the back for finally moving on to the next step 🙂 At this point, I was 2 hours into the baking process and there was no turning back.

The icing was fairly easy to make but my favorite part of the process was the decorating! I just bought an icing bag and tip and was ready to go to town! Printed some nifty signs and voila!

Based on the responses, this seemed to be a hit 🙂 Horray for me! My first notch on the Mommy Belt. Next time I’m going to adapt this recipe to some kind of berry… Here’s the recipe for those interested:

CUPCAKE (makes 18):

• 1 box chocolate cake mix
• 1-1/3 cup orange juice
• 1 tablespoon orange zest
• 1 tablespoon vanilla extract
• 3/4 cup vegetable or canola oil (I think that’s what the box instructions say)
• 2 tablespoon sugar
• 3 eggs

Whisk these ingredients together and fill cupcake liners 2/3 full. For 12-cupcake pans, set the oven at 375 degrees and bake for approximately 25 minutes. Stick a toothpick in the cupcake to check if it’s done. Clean toothpicks mean it’s done… those that come out with sticky chocolate on the toothpick will need a few more minutes in the oven.

ICING:

• 8 oz. cream cheese (softened at room temperature or get the whipped kind)
• tub of whip cream (I prefer fat free or light versions)
• 1 orange
• 1/2 cup powdered sugar

Remove the skin from the orange and cut into pieces. Place orange bits in a food processor and puree. Boil the puree until it reduces by about 50%, then let it cool off. In a bowl, mix the cream cheese and powdered sugar (with an electric hand mixer or manual labor is fine, too). Once the reduced puree has cooled, mix in with the cream cheese. Fold the whip cream in lightly, to keep the fluffiness of the icing. Easy peasy! For the topping, i shaved some dark chocolate and sprinkled it generously.

Read Full Post »