Feeds:
Posts
Comments

Archive for the ‘DIY Projects’ Category

Think me vain or victim of early mid-life crisis, but I don’t want motherhood to turn me from a youthful, style-conscious woman into a frumpy mess, with no time to take care of myself. That’s how I’ve been feeling these past 34 weeks of pregnancy… Lack of motivation, energy and reason to make myself presentable. Looking at pictures of myself from just 2 years ago, one has to wonder, “Who the heck is that??”

I’m thankful to have had a safe and healthy pregnancy thus far (and hope it continues to birth), but my self esteem has taken a beating. Gaining 40lbs and being super uber swollen all the time is NOT a fab feeling. This has been somewhat of a “scared straight” experience to motivate me to work my ass off after Baby Chan arrives to look and feel great again. It’ll be a challenge, since availability of time and energy will be dictated by his needs, but one I’m ready to take on.

STEP 1: Little things can be done right now towards looking like a stylish mom. A cool diaper bag is a necessity. After all, that will be my primary accessory for the next few years. It doesn’t, however, have to mean paying a ridiculous amount of money for one. Smart spending is always in style 🙂 So after drooling over the Petunia Pickle Bottom bag of the woman who sat next to me in the OB waiting room, I decided to find my cheaper alternative. And perhaps one that doesn’t scream diaper bag.

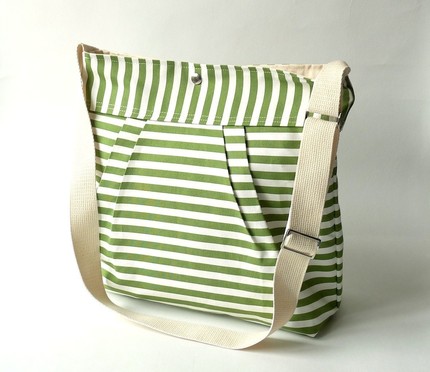
Etsy.com is my favorite site. It’s like Ebay for unique and stylish people 🙂 After browsing for almost 2 hours, I decided on this nautical, somewhat gender neutral piece, made in Paris by a fellow mom and bagmaker. It’s made of full lined french heavyweight 100% duck canvas (whatever that means) and can be used as a shoulder or messenger bag. Even after shipping from Europe, this beauty only cost $55! Woot woot! Can’t wait to get it…

Excited from my purchase, I decided to get crafty and make my own travel changing kit on the cheap, instead of paying more for a generic one from Babies R Us. Let me tell you, it was TEDIOUS!!! Especially since I didn’t have a tutorial or manual to go by and had to figure everything out myself. The good news is I finally learned how to thread the sewing machine on my own (since Kevin wasn’t around to help this time). It’s machine washable and will hopefully last awhile 🙂 This was my project for the week.

It features the green from my diaper bag, but also adds interesting designs and color elements. I especially love the wooden faux button 🙂 The changing pad is actually held closed with velcro. And when open, the bottom is a big pocket, to hold diapers and wipes. I spent $13 on all materials and have a yard of fabric left to do something else… decorative pillow perhaps??? HMMMM…
Read Full Post »

Kevin and I bought a used glider/ottoman set off Craigslist a few months ago, for our nursery. The upholstery was appalling (to put it mildly) but the price sure was attractive at $40. My intention was to have the glider reupholstered by mommy dearest next time she came (hehe, I’m notorious for creating “to do” lists for parental visits). But after looking at the ugly fabric for months and not being able to stand another day of it, I decided to woman-up and give this project a try today. After all, I’m grown and about to become a parent myself. Can’t rely on my mom forever. With that decision made, I skipped over to Joanne’s for some fabric shopping while Kevin got to work setting up the sewing machine (how sweet of him). Here he is, learning how to line up the string 🙂

I was surprised to discover whoever reupholstered before took the time to make zippers and all, so removing the covers was very easy. But what I found underneath the covers was even more hideous. Eeeks! Had to step back for a second and wonder if I was better off to have purchased a new one. Bah!

The seat of the glider was so squished from years of sitting that I traded the pad from the ottoman (which was in much better shape) with the seat pad. My hope was to make this reupholstering project as simple as possible, since I don’t know much about sewing. And surprisingly, it was. Within less than 2 hours, I had this:

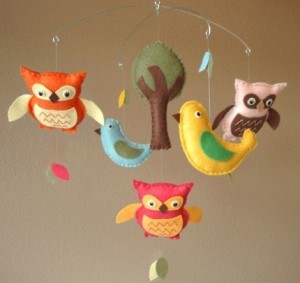
I wish the pattern was larger, for a more chic impact, but Joanne’s fabric selection isn’t the best and this was the best I could find. Proud of myself for a job well done, I decided to take it one giant step further and add an owl themed back pillow (the nursery’s theme will be owls and the forest). My favorite site for creative research is Etsy.com and a quick search for “owl pillows” produced a few samples to go off of:

These are super cute, but not very functional. I needed a short, wide pillow for lower back support, and took off making my “revised” version to fit this need. Between the glider ($40) and the new upholstery fabric ($21), cost was rising and I wasn’t prepared to make another run to Joanne’s. A quick scan of our house produced several fabrics that could be repurposed for this project. Mainly, Goodwill-destined clothes that we hadn’t gotten around to dropping off yet. Horray!

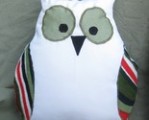
I cut an old tank top up for the pillow itself and started creating it’s face with other old shirts we had. I swear, we’re pack rats!!! But apparently, that comes in handy sometimes haha. We got stuffing from a decorative pillow I bought last summer that Simba chewed up within 2 days and we never bothered to throw away. And to tie it all together with the glider, I used leftover scrap fabric for the owl’s chest. Voila! My first attempt at an owl pillow.

If you have a creative mind (or just squint a little), you can make out an owl resemblance. What an exhausting project! It took about 5 hours to do, so basically, the bulk of my Saturday.

Next project: OWL MOBILE!

Read Full Post »